

Authorization header. Zapier uses the same keys. The MCP server does not; it signs in through your browser instead.
available_credit_balance.
Create a key
1
Pick the mode
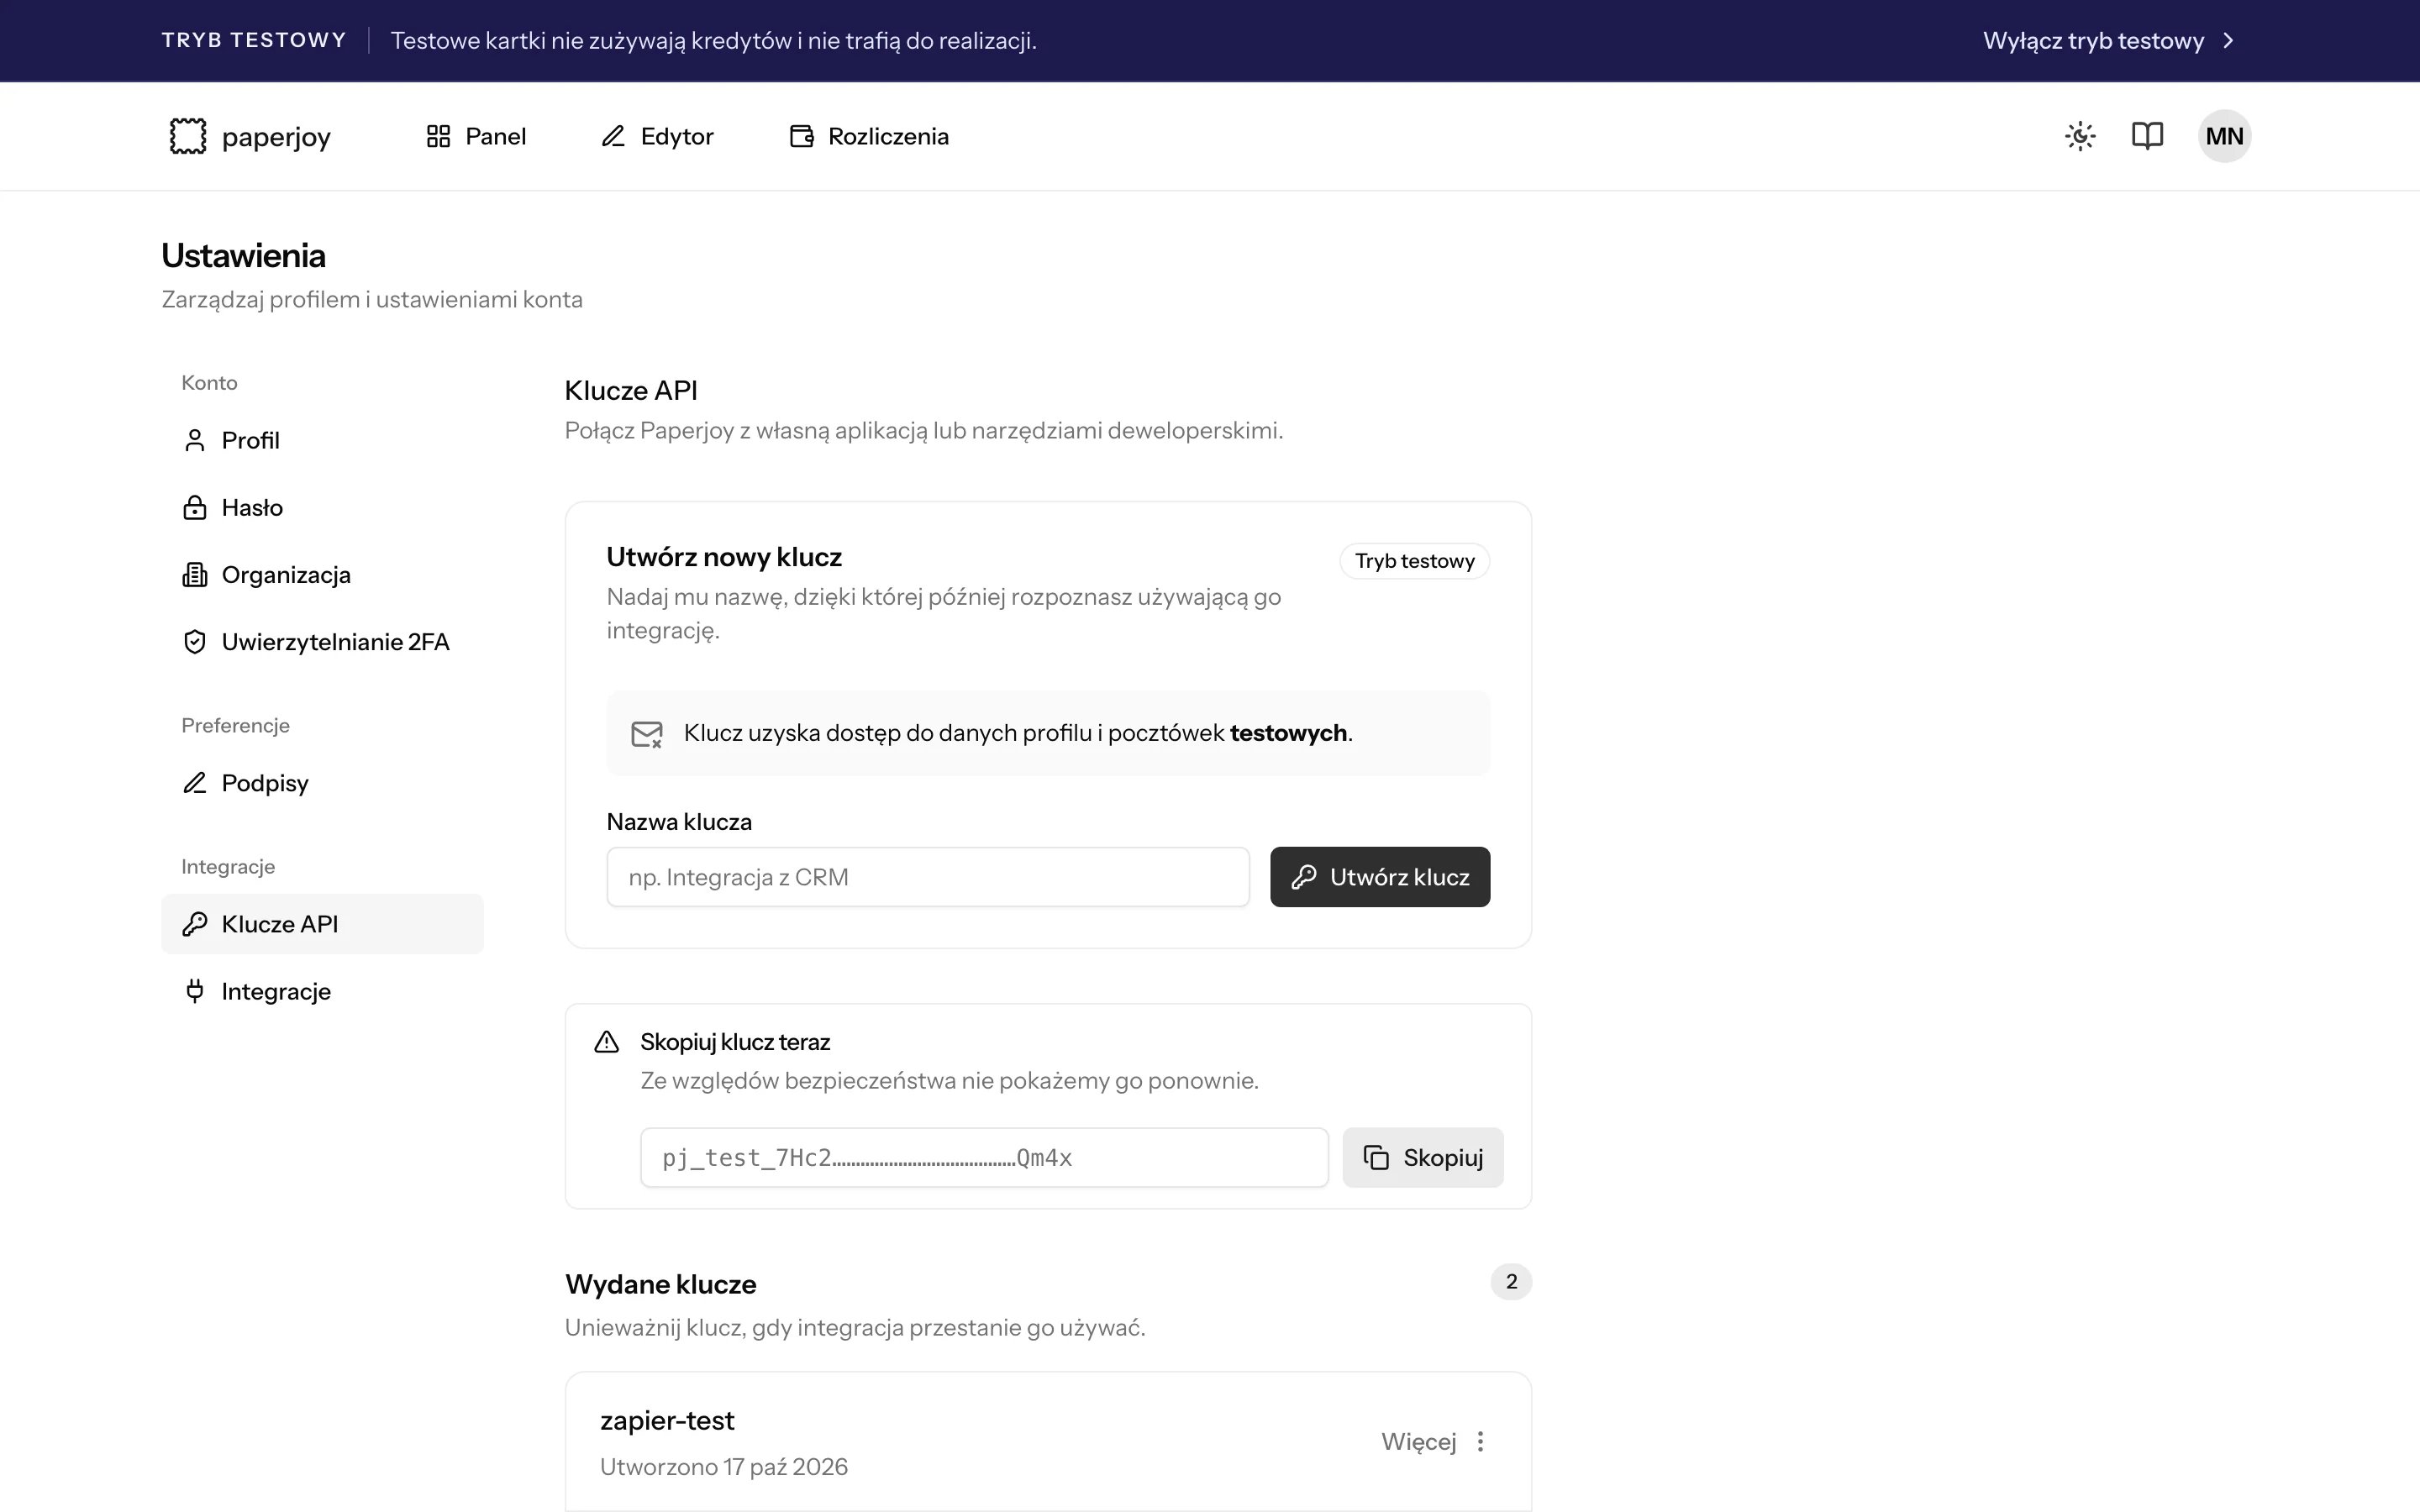
Keys belong to the mode that is active when you create them. Turn on test mode for a
pj_test_ key, or leave it off for a pj_live_ key.2
Open the API keys page
Go to Ustawienia → Klucze API (Settings → API keys). You can also reach it from the account menu.
3
Name and create the key
Use a name that tells you where the key lives, such as
shop-backend or zapier-crm, and click Utwórz klucz (Create key).4
Copy it right away
The full key is shown only once. Paste it into your secret manager or environment variables before you leave the page.
Test and live keys
The prefix helps you and secret scanners recognize a key. The mode itself is stored with the key and can’t change.
Abilities
Keys created in the app can do everything below.Limits
Rotate or revoke a key
To revoke a key, open Więcej (More) next to it and choose Unieważnij klucz (Revoke key). It stops working immediately. The page only lists keys for the current mode, so switch modes to manage the others. To rotate without downtime:- Create the new key.
- Deploy it to your integration.
- Confirm requests succeed.
- Revoke the old key.
Keep keys secret
- Keep keys on your server, in a secret manager or environment variables.
- Never put a key in browser JavaScript, a mobile app, or a public repository.
- Use a separate key per integration so you can revoke one without breaking the others.
- Revoke a key immediately if it may have leaked.